Okay, this one's long overdue but you'll see why shortly. So hunker down with some snacks cause it's gonna take a while to get through this one. Hopefully by the end of this post, those of you who have expressed interest in building your own Mini Tall will be super stoked and ready to start your own projects :-D. So here goes!
PLEASE NOTE: I was taking these photos as I was working so A) They're not all perfect and B) There's so many I didn't bother putting as much effort into each one as I normally would. However, I think they'll do the trick..
DISCLAIMER: This is the part where I cover my ass by saying that I take zero responsibility for you being a fucktard and chopping off your fingers off or blowing your garage up because you're too retarded to know any better.
While I consider this design to be the easiest and fastest way to build a proper straight and true mini tall bike to standard geometry (that's WAY more fun than scary compared to a standard double tall Tall Bike ((Not to mention WAY less noddle-ly feeling when you stand up to throw the muuuuther fucking hammer down!!)) ), it will require some previous knowledge and expertise to pull it off properly. If this is your first project, don't be discouraged! Please be sure to take your time and don't rush through anything. Mitering tubes by hand takes patience and a lot of fitting and filing, fitting and filing, etc, etc..
DISCLAIMER: This is the part where I cover my ass by saying that I take zero responsibility for you being a fucktard and chopping off your fingers off or blowing your garage up because you're too retarded to know any better.
While I consider this design to be the easiest and fastest way to build a proper straight and true mini tall bike to standard geometry (that's WAY more fun than scary compared to a standard double tall Tall Bike ((Not to mention WAY less noddle-ly feeling when you stand up to throw the muuuuther fucking hammer down!!)) ), it will require some previous knowledge and expertise to pull it off properly. If this is your first project, don't be discouraged! Please be sure to take your time and don't rush through anything. Mitering tubes by hand takes patience and a lot of fitting and filing, fitting and filing, etc, etc..
Okay, now that we've gotten all of the BS out of the way, on to the fun!
First of all, get really fucking stoned off your ass and watch the ENTIRE Back to the Future Trilogy. In a row. No breaks. Don't forget the Pringles and Pop ems' tho! You won't make it through without them!!
Right then, now that you're fully stoked off your fucking ass, get yourself two frames with exactly matching TT's if you can. In my case, two same size Milwaukee Bruisers:
Right then, now that you're fully stoked off your fucking ass, get yourself two frames with exactly matching TT's if you can. In my case, two same size Milwaukee Bruisers:

If not, you can manage with a difference of a cm at most. Any more and you're going to have to shorten the TT of the top frame to compensate. In which case, make sure the top frame's TT is longer than the bottom frame's TT. You can do with the opposite but I feel like that would be a bigger PITA..
Aside from hand files, and a welder/torch set up, having a cut off wheel:

..and some ear and eye protection:

Will make your life MUCH better..
To help you better visualize the first chop at hand, place a piece of masking tape along the center of the DT and bottom stay/dropout rear drop out:
To help you better visualize the first chop at hand, place a piece of masking tape along the center of the DT and bottom stay/dropout rear drop out:

Now that you have a better idea of what's about to happen, take the first step by chopping the DT as close to the HT as you can without damaging the HT or TT (smaller worn down cutting wheels will help with the tight spots. A dremel or small metal hand saw wouldn't hurt either):

First incision done:


Next, chop into the DT and ST at the BB junction:

Then chop the ST a few inches up giving yourself a little extra material to work with..
Chopped!:
Chopped!:

Next you want to chop the rear stay. But before you do, be sure to install an axle or what have you to keep the rear spacing correct and tight enough so it won't suddenly slip out since that would really suck. In this case, 120mm:

Chopped!:

Next - Clean your chopz!
Before:
Before:

After:

Before:

After:

Then use the tape from earlier to help guide you while making your ST miter:

You'll notice in the above photo that the chain stay is now too long and needs to be shorted in order for the BB to intersect the ST properly.
Figure out your new drop out configuration and shorten it to fit the space:
Figure out your new drop out configuration and shorten it to fit the space:

PLEASE NOTE: Chopping the stay this way has it's PRO and CON. The PRO being that a shorter chain stay equals a tighter drive train which is AWESOME! The CON however is that the tire will now sit in much closer to the BB which means tire width is often an issue. You can easily compensate for this by shaving out some space on the insides of the chain stays. PITA but in all likelihood, you simply WON'T have a choice. Esp if you want to run some fatty tires! Double check things BEFORE you weld it all up so you have an easier time working on it while the BB and chain stay are separate..
You don't want to go too far with your miters til you have the DT close to being done as well. You'll need both close to being done for the final fit..
You don't want to go too far with your miters til you have the DT close to being done as well. You'll need both close to being done for the final fit..

Here you can see how far off the DT's original miter is for this design:

Much better after a little work:


Just about there!:

Close up of the ST miter:

Check that fucking line up THRICE!:


Looks great!
Here we are all cleaned up and waited to be welded up:
Here we are all cleaned up and waited to be welded up:

BE SURE to tack it only at first to check the line up! Check it at different angles as well and get a second set of eyes you know you can trust if possible. Once it all looks good go ahead and weld the sucker up!
The smoke looks cool when it bellows out during welding:
The smoke looks cool when it bellows out during welding:

Now the only welding gear I have is a MIG welder and a Torch set up. Since I'm still acquainting myself with the torch, I figured I'd stick with the MIG welder for this job since I'm more familiar with that. Esp seeing as how it's a bruiser and is they need to be built tough. If I had a TIG welder and the experience required to use one, I would most certainly would've used that instead..
Here's the main reason why:

FUCKINGSONOFABITCH!!!
Yeah, that shit bums me out big time! However, since Brusiers are loaded up with gussets I figure adding one more to the mix couldn't hurt:
Yeah, that shit bums me out big time! However, since Brusiers are loaded up with gussets I figure adding one more to the mix couldn't hurt:

Weld that bitch up:


For some reason the only pic I have at this stage is a shitty iPhone pic:

Don't worry about the messy welds yet either. Once you have the frame completed you can spend all the time you want cleaning up those joints and makin' em nice and smooth. Or just leave em like that if you don't give a shit. I personally spent a bunch of time smoothing out the weld with some brazing and a lot of filing..
This first part concludes what I see to be the most time consuming and challenging part of the build. There's more tough parts ahead but mitering and properly aligning the sub frame really is the make or break moment..
Next, on to chopping the second frame!
You don't need any tape here. Just chop like so making sure to give yourself an extra amount of ST once again:
This first part concludes what I see to be the most time consuming and challenging part of the build. There's more tough parts ahead but mitering and properly aligning the sub frame really is the make or break moment..
Next, on to chopping the second frame!
You don't need any tape here. Just chop like so making sure to give yourself an extra amount of ST once again:

Save the bottom piece for something else and or scrap..
With this part of the frame, you're going to have to patch some holes along with the clean up:

What I did was cut some circles from other tube pieces and put them carefully in place. Leave them a little bigger than the holes so you can squeeze em into place. Having a magnet or tacking on a piece of wire to help hold it in place would also work..

First one brazed, second one in and about to start:

Second one done..

and cleaned:

Now for the top of the rear stay..
Start:
Start:

Cleaned:

Now, here's the interesting part. The orange frame had a seat post so badly seized up in there that I had to make this long incision into the back of the ST to get it out:

With any luck you won't have to worry about some shit like this but I figured I'd include this in the DIY just to show you how I fixed the issue while adding a little flair in the process..
First thing I did was patch up a portion of the original incision (along with a hole):

You just have to be careful not to get too much material on the inside of the ST cause then you'll have problems putting the post in later. I used a dremel to help ream the inside out a bit..
Here it is with both holes patched and cleaned:
Here it is with both holes patched and cleaned:

Then I decided to add a little flair in the form of a patch. I started out with a piece I took from of the bottom frame. Which in the end I really wish I hadn't since it was way too thin for this type of shit. The thickness of the piece I use a few steps from now would've been MUCH better..


Final piece:


I decided to go for an 'M' for Milwaukee :-)
Covers the area quite nicely!

Brazing a piece this small was kind of a nightmare. Since the metal was so thin it would constantly warp funny unless I put direct pressure on it. Didn't help I'd never done something like this before..


Yeah, I made a mess. Came out decent enough tho!
Next is the extension for the HT's! This is the first time I've make a freak bike from frames with 1+1/8th HTs so it made things interesting. I usually use a piece of standard 1" gas pipe for the extension but I obviously couldn't with this build. Unfortunately the next size up pipe proved to be a bit too big. To compensate for this I put a section of the larger sized pipe in the vise and made a slice:

Made sure there was ample space for the weld material it grab on to:

Clamped that bitch shut:

Welded it back together:

Cleaned it up:

and we're GTG!:

Next I made an insert for the where the top of the bottom frame's ST meets to bottom of the top frame's ST. Adding some meat to the inside helps strengthen things up:

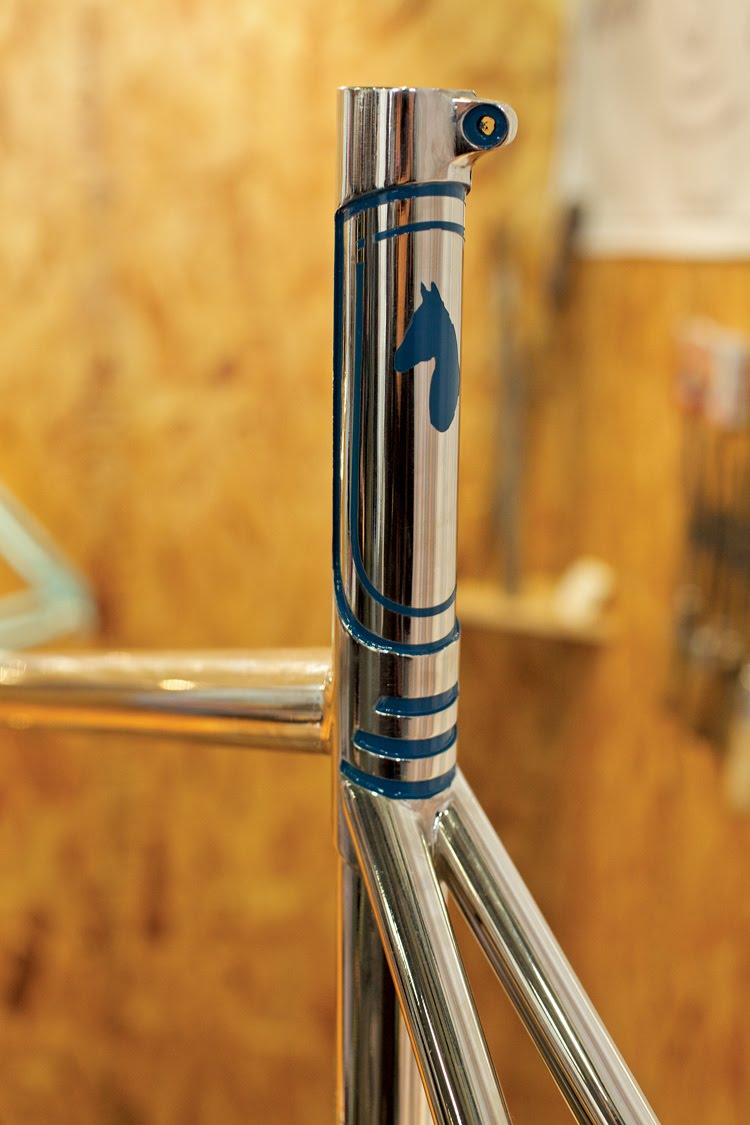
I was still stoked on the janky 'M' I made earlier, I decided to go with a little more flair in the form of a collar:

Bitchin'!

Next you want to chop the top frame's ST down til you get it where you want. At the same time you want to work on the HT extension as well. This is where you can fit the frame to your riding size preference. Measure the CTC or CTT of the ST as you go along. Once you get it to your size you're all set! Then shave down your HT extension and make sure they're even on both sides. Once you get them both lined up properly and tacked up nice, be sure to double check the alignment. Since I set this up with an insert on the inside of the ST's I was able to cut the top frame's ST a little short. Once I figured out the HT extensions length and tacked it up, I then adjusted the height of the rear accordingly..
HT tacked:

Once I was confident everything was in proper alignment, I went ahead and welded/brazed everything together. Here's the ST collar covering where the two frames were attached:

HT's all welded up:

and there you have it- ALL DONE WITH the frame!!


The next thing you have to do is weld up the fork extension to fit the frame. I've done this a bunch of times but I can tell you that building this fork was the HUGEST PITA to say the least! A standard one inch fork can be easily extended with a piece of half inch gas pipe as seen towards the end of this post from a while back, along this this photo..
Having the fork properly aligned is CRUCIAL! If you don't do it right you'll spend hours fucking with it or just re-chopping and rebuilding it so take your time..
The fork on this build was especially hard because not only were the steerer tubes 1+1/8th which meant I couldn't go with the standard 1" with 1/2" insert pipe set up:
The fork on this build was especially hard because not only were the steerer tubes 1+1/8th which meant I couldn't go with the standard 1" with 1/2" insert pipe set up:

but the inside diameters were totally different:

Fucking. SUCKED!
So yeah, it took me a while but in the end I got to work properly and bar spin okay too!
PLEASE NOTE: Don't even think of using a sealed bearing set up for one of these bikes! Unless you've made the extended steerer tube and HT extension absolutely perfect. Which you honestly can't do unless you're already a pro builder or have some crazy jig or some shit..
Also, there's a reason why I use Thomson set back seat posts for these builds. While tossing about a foot of another frame on top of a standard geo frame isn't too big a deal, it will sit your ass back closer to the rear axle. I learned with my first tall bike that doing so makes wheelies SCARY easy. To help aid in keeping the balance in the right place, fit the bike with a set back post reversed and add an extra cm or two to your normal stem length. This will effectively combat the scary wheelie thing..
So yeah, it took me a while but in the end I got to work properly and bar spin okay too!
PLEASE NOTE: Don't even think of using a sealed bearing set up for one of these bikes! Unless you've made the extended steerer tube and HT extension absolutely perfect. Which you honestly can't do unless you're already a pro builder or have some crazy jig or some shit..
Also, there's a reason why I use Thomson set back seat posts for these builds. While tossing about a foot of another frame on top of a standard geo frame isn't too big a deal, it will sit your ass back closer to the rear axle. I learned with my first tall bike that doing so makes wheelies SCARY easy. To help aid in keeping the balance in the right place, fit the bike with a set back post reversed and add an extra cm or two to your normal stem length. This will effectively combat the scary wheelie thing..
Since we're on the topic of seat posts, Thomson set back posts only come in seven different sizes. 26.8 and 27.2 being the most common. Here's a full list at the bottom of the page. Point is, while you can make this style of mini tall bike from just about any frame, if you want to use a Thomson set back post, make sure the top frame's ST size is a more modern size. There are other posts out there that can do the same thing for me, not to mention you could probably just make one yourself. I just dig Thomson gear..
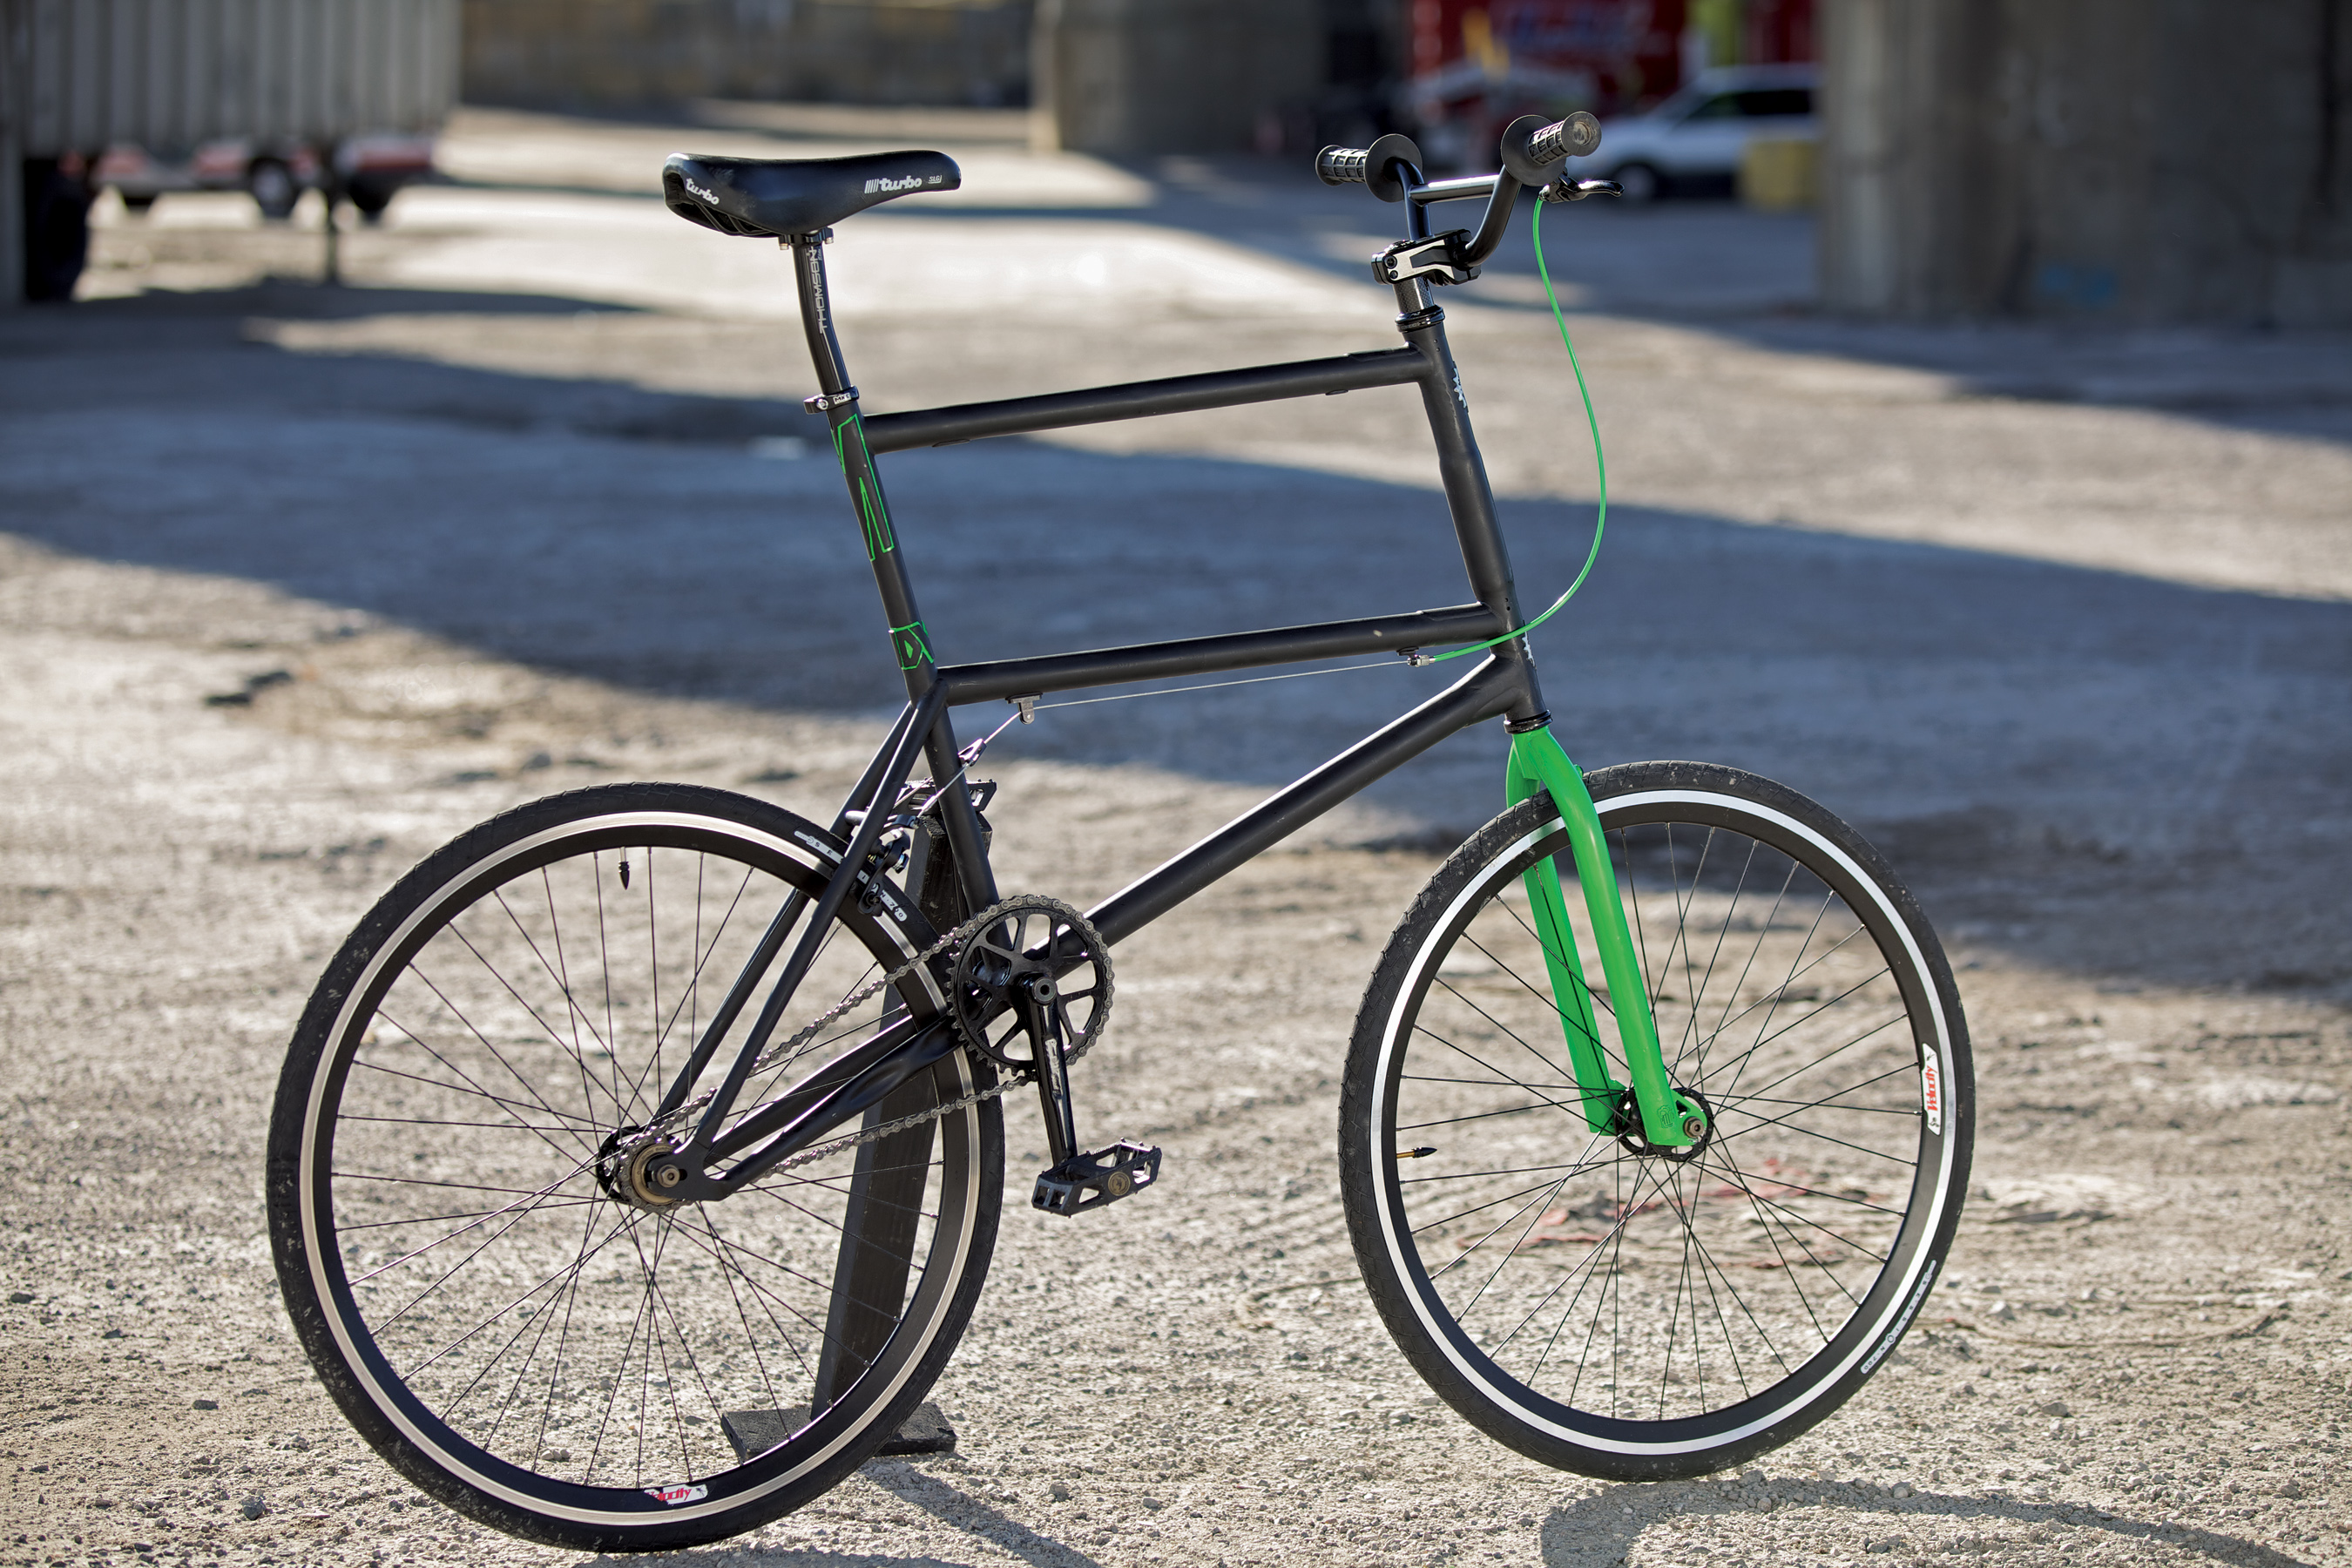
In any case, once you get that shit all clean, smooth and painted, built that fucker up and get RADICAL!!:


This DIY is pretty fucking huge and it wouldn't surprise me if I left some gaps or unanswered questions. Please leave me some comments on the subject and I'll add info where I think it's necessary..
The biggest thing about this build for me is the move from nerding out on others builders bikes, to nerding out more on my own! All the other freak bikes I'd built up til when, dare I say- 'developed' this design have been more about building something silly, as opposed to something you can properly tear ass around on. Riding this bike (and the other one I built recently which you'll be seeing very soon) is nothing short of the funnest fucking thing on two wheels I've ever ridden. I'm not even fucking around in the slightest either! It's just the right height. Tall enough to see over cars and be silly/fun/rad looking, but not so tall you're nervous while riding through traffic worrying about falling over, when you're going fast and or making sudden turns or suffering carrying it up stairs or loading it into a car. Fucking thing handles like a champ and is super stiff too! Love it!!
You owe it to yourself as a true cyclist to create something yourself, whatever it may be, and feel the exhilaration of flying down the street on something you made with your own two hands!
Okay, wow, enough already huh?! This is like the longest blog post in blogishpere posting history!! In any case, I hope you all enjoyed this DIY and get around to making a mini tall freak bike yourself. Be sure to send me some snaps if you do!!